These instructions are for all varieties we launch. Any specific differences, if any, would be emailed to you.
Table of Contents
📌 Bookmark this page for easy access. Legal Notice: Kits are intended for microscopy and research only. All content is educational and not meant to encourage any illegal use.
Discard winter heating packs.
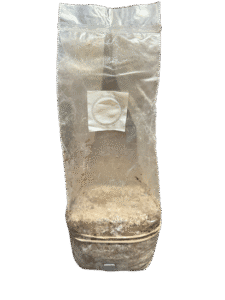
Congrats — you’re holding a fully colonized grow bag of Hillbilly(or maybe one of our limited varieties), one of the most reliable and yee-haw-yes-this-works varieties of P. cubensis magic mushrooms out there.
We already did the hard part (sterile lab work, inoculation, breaking & shaking, praying to the mushroom gods).
Now all you need to do is give it the right environment and let nature do its weird, wonderful thing.
Oh — and don’t skip the FAQ at the bottom. It’s packed with answers to the most common questions we get.
Let’s get growing!
Why Hillbilly?
Because not all mushrooms are created equal — and Hillbilly is a total overachiever 🍄
Here’s why we picked it as our go-to strain:
✅ Big harvests, big smiles — This variety knows how to show up ✅Quick to pin, fast to win — Once it gets going, it doesn’t stop ✅Tough as hell — Strong resistance to contams means fewer issues ✅Seriously strong — Let’s just say… you’ll feel it ✅No spore storms — Harvest window stays open longer, no black spore mess everywhere
Basically, Hillbilly gives you more mushrooms, less stress, and a smoother growing experience. Yeehaw.
IMPORTANT- We get emails about this daily so wanted to put it right at the top. Mushrooms and mycelium will often turn blue. This IS NOT contamination. Bruising and oxidation causes bluing and its totally normal, especially when you dry them. You’ll also see white fuzz on mushrooms and substrate, this IS NOT MOLD, it’s just mycelium that looks extra wispy, especially in bag grows.
Stand the bag upright in a clean area.
See some cracks in the substrate or is it totally messed up, black, not white and colonized? No worries! Shippers are not gentle with boxes and toss them around but it’s super easy to fix. Just press it back down into a block, just like Play-Doh, and the mycelium will reconnect like it never happened in just a few days.
Gently pull the front and back of the bag apart so the white filter patch has breathing room — you don’t want it squished against the back wall. Mushrooms like their airflow
Make sure the rubber bands are sitting about 1 inch below the top of the block like shown in image. This cuts off excess oxygen on the sides to help prevent rogue side mushrooms from popping up like uninvited guests. side pinning.
Black button or grey square on bags is just an injection port, where we inject the genetics.
Optional Tip: Reduce Side Pins with Paper Wrap
If you want to encourage more top growth, wrap the bottom part of the bag (just the white substrate block) with the brown packing paper from your box — or any breathable paper you have.
Keep the filter patch and upper part of the bag completely uncovered. Only wrap the actual block.
Secure the paper using the included rubber bands
This helps block side light, which may reduce side pins and encourage your mushrooms to grow on top where they’re easier to harvest
While this won’t prevent all side pins (humidity and other factors also play a role), it’s a simple trick that often improves results — especially during the first flush.
🌡️ Light, Temp & Air
✅Lighting: Give them 6–12 hours of indirect sunlight or artificial light each day. LEDs or fluorescents are great. Pro move: plug your light into a cheap timer and let automation do its thing.
✅Temperature:
Keep the room between 68–78°F.
Below 66°F = lazy mushrooms
Above 80°F = more risk of contamination and blobbing
If you need more warmth, you can buy a $15 seedling mat on Amazon, set it to 74, and use a small towel between mat and bag.
✅Airflow: Air circulation is key to helping the bag exchange co2 for fresh oxygen. A ceiling fan or small desk fan works great — just don’t aim it directly at the bag or you’ll dry things out
⌛ The Waiting Game (a.k.a. Mushrooms Being Mushrooms)
Now that your setup’s dialed in… a whole lot of nothing is going to happen. Totally normal. Your mycelium is just doing its thing underground.
You’ll wait a week then follow the instructions below-
💦 Humidity and Manual Air Exchange Boost 💨
Environmental conditions matter — if the air is dry or temperatures are lower, the top layer of your grow kit can dry out faster. When this happens, it can lead to more side pinning and less top growth.
To maintain the proper microclimate inside the bag, use the slice-and-spray method below only when needed — especially if the surface looks like it’s drying out or humidity inside the bag is low.
⏳ When to Start
Give your kit 1 full week after delivery before doing anything. This lets it chill out and recover from any shipping stress.
It’s time to boost fresh air exchange — this helps lower CO₂ levels and gives your mushrooms the memo that it’s time to grow up and glow up.
🧠 Here’s How:
🔪 Step 1: Give it some breathing room Use a sharp knife to carefully cut a 2-inch horizontal slit, about 2 inches below the white filter patch.
This little airflow upgrade often gives growth a big push.
💦 Step 2: Increase humidity After adding slice use a spray bottle and stick the nozzle in the bag and spray the bag walls, avoiding the filter patch. Spray about 5 times to start.
Then every couple days check and see-
If the walls look dry? Give them a light mist with clean water.
You want it to look humid in there — think rainforest, not desert.
Don’t spray directly on the mushrooms or the substrate. Just the bag walls.
If you’re not able to spray water a few days you can just tape over the slice, and the bag will maintain humidity fine.
💨 Step 3: Manual Air Exchange
Once the slit is cut, gently introduce some oxygen into the bag by separating the bag walls and bringing them back together a few times.🌱✨
Patience, airflow, and a little mist = mushroom magic.
Stick with it — the fun part is almost here 🍄💛
🍄 Step 2: Watch for Fruiting
Here’s where things start to get exciting — slowly… and then all at once.
Our Hillbilly strain takes its sweet time to start pinning (baby mushrooms forming), but once it does? Boom. Growth explosion. Think: zero to harvest in just a few days.
Expect to wait 2–3 weeks before pins show up. That’s totally normal. Be patient.
👁️ What to Watch For:
Tiny little white heads pushing through = pins
Within a few days, they’ll double in size (and then some)
You’ll go from “nothing’s happening” to “harvest time” real quick
💧 Pro Tip for Side-Pinners
If your shrooms are mostly sprouting from the sides and you have no center growth:
Lightly mist the center surface of the block once or twice
You’re aiming for slightly moist, not soggy
Then mist the bag walls a couple of times to bump up humidity
This encourages the top to join the party 🎊
✂️ Step 3: Harvest Time!
You made it! Your mushrooms are officially all grown up and ready to be picked. Here’s how to know when it’s time to harvest — and what to expect.
🍽️ When to Harvest
Look for these signs:
Most the caps have opened and are starting to flatten a bit
If the bag is looking super crowded, you can harvest early to make room for Round 2
Because Hillbilly doesn’t drop spores you can let the little guys catch up to the big ones without worry
💡 Bonus tip: It’s totally normal to see a bit of blue bruising at this stage. It’s just oxidation — not mold.
Two harvesting methods:
Top-cut method:
Cut open the top of the bag below the seal with scissors.
Wash hands or wear gloves, then gently twist and pull mushrooms near the base.
Hood-cut method: (Preferred)
Cut the bag an inch above the substrate, leaving the back wall intact to form a “hood.”
Use a sharp knife or scissors to cut mushrooms just above the substrates base.
🧠 Pro Tip: If your flush looks like a forest in there, go with the hood-cut — it makes harvesting way easier and cleaner.
Step 4: Get Ready for More Harvests
After your first harvest, it’s time to rehydrate the block to encourage another flush of mushrooms.
Most kits will produce 2–3 flushes, with smaller yields each time. Some bags may stop after one flush if the first harvest was very large, or if contamination appears.
Two Rehydration Options:
💧 Rehydration Options
1️⃣ Soaking Method (Recommended)
This is the most effective way to rehydrate your substrate:
Pour filtered or bottled water into the bag until the block is fully submerged
Place a clean, heavy object on top to weigh it down
Let it soak for 2–4 hours
Drain the excess water by carefully tilting the bag
Optional: Add 1 tablespoon of hydrogen peroxide to the soak to help reduce contamination risk.
2️⃣ Spray Method (Less Effective, but Easier)
If you prefer a simpler option:
Use a spray bottle to heavily mist the substrate and inner walls of the bag
Mist daily for 3–4 days
🦭 Resealing the Bag for the Next Flush
Depending on how you originally opened the bag:
Top-Cut Method: Fold the top of the bag down about 1 inch and secure with tape or a paper clip
Hood-Cut Method: Fold the open flap over itself and secure it with the original rubber band Add tape if needed to keep it sealed
⚠️ A Few Things to Know
Expect smaller yields with each new flush
Contamination (strange smells, fuzzy mold, etc.) can appear between flushes — if it does, discard the bag
If nothing grows after 2 weeks and conditions were correct, the block may be finished
With the right conditions, most bags produce at least a second flush. Just rehydrate, reseal, and wait — your next harvest is on the way
🚱 Step 5: Drying Your Mushrooms
Proper drying is key to preserving your mushrooms for long-term storage. You want them bone dry — no bend, no moisture — so they stay fresh and potent.
Option 1: Use a Dehydrator (Highly Recommended)
This is the easiest, most reliable method:
Set your dehydrator to 120°F
Slice larger mushrooms in half to help them dry evenly
Spread them out on the racks and dry for 12–24 hours, or until they snap like crackers
💡If you don’t have a dehydrator, you can find a reliable one on Amazon for around $40 — and it’s worth every penny.
🍥 Option 2: No Dehydrator? Try This Backup Method
This works in a pinch, but it’s less consistent:
Step 1: Place your mushrooms on a paper towel in front of a fan set to high for 24 hours
Step 2: After fan drying, transfer them to a parchment-lined baking tray.
Set your oven to its lowest temperature
Leave the oven door slightly open for airflow
Check every 15–20 minutes until the mushrooms are completely dry
You’ll know they’re done when they snap cleanly with zero bend.
⚠️ Mushrooms may darken or turn black in the oven — this is normal and they’re still safe to use, but the color won’t be as pretty.
📦 Step 6: Storing Your Mushrooms
Once harvested, you’ll want to store your mushrooms properly to keep them fresh and potent for as long as possible.
✅ Best Storage Methods
Use mason jars or vacuum-sealed bags for long-term storage
Add a desiccant packet (available on Amazon) to absorb any leftover moisture
Store in a cool, dark place like a cabinet, pantry, or drawer
Mushrooms stored this way can stay fresh and effective for over a year
⚠️ Temporary Storage
You can use zip-top bags if needed, but they tend to let in moisture
This may shorten shelf life, so it’s best for short-term storage only
FAQ
Is this contamination?
Not Contamination: Common Mycelium Characteristics
✅ White Fuzziness
🔍 What to Look For: Wispy, fluffy white growth on the substrate or mushrooms. ⚠️ Cause: High CO₂ levels due to insufficient fresh air exchange. This is common when using bags to grow as there’s less air flow and isn’t necessarily a problem as long as mushrooms are growing fine. ✅ Solution: This is normal in bag grows and not an issue because we use genetics that grow well under these conditions. However, you should ensure there’s good airflow in the room—use a ceiling fan or a small fan at least a foot away from the bag. Cut slit in bag as shown in step 1.
✅ Blue Spots (Bruising)
🔍 What to Look For: Light to dark blue patches on the mycelium or mushrooms. ⚠️ Cause: Mycelium bruising from handling, dryness, or stress. It’s also common for mushrooms to blue during or close to harvesting due to oxidation. ✅ Solution: Bluing is normal from oxidation or bruising, nothing to worry about.
✅ Yellow Liquid (Metabolites)
🔍 What to Look For: A golden-yellow or amber liquid on the substrate. ⚠️ Cause: Mycelium metabolites, a natural mycelium secretion sometimes in response to stress, often during shipping temperature fluctuations. ✅ Solution: This is not contamination. You can leave it as is, but ensuring proper airflow and humidity will help reduce metabolite buildup.
Handling Contamination: What to Expect & What to Do
Contamination is a natural part of mushroom cultivation since mushrooms thrive in the same moist, nutrient-rich environments that molds and bacteria love. However, your grow bag arrives fully colonized, meaning the mycelium is strong and naturally fights off contaminants. This significantly reduces the risk, but if the bag is opened or exposed to outside elements, there’s always a small chance contamination could occur.
Signs of Contamination & How to Handle Them
1️⃣ Unusual Colors
🔍 What to Look For: Green, black, pink, or yellow patches on the substrate or mycelium. ⚠️ Likely Cause: Mold or bacterial contamination (e.g., green mold = Trichoderma). ✅ What to Do:
If contamination is small and isolated, carefully remove the affected area using a sterilized utensil.
If the contamination spreads, discard the bag immediately to prevent cross-contamination.
2️⃣ Foul or Sour Odor
🔍 What to Look For: Smells like rotting food, vinegar, or ammonia. ⚠️ Likely Cause:Bacterial contamination inside the substrate. ✅ What to Do:
Discard the bag immediately—bacterial contamination cannot be salvaged and can spread quickly.
💡 Final Tip: If you’re unsure whether something is normal or contamination, send us a clear photo with good lighting at info@happymushrooms.com—we’re happy to help! 🍄
No Pins after 3 weeks?!
Hillbilly takes time to pin—sometimes up to 4 weeks. If there’s no contamination, you’re fine!
Ensure proper lighting, airflow, and temperature.
If no pins after 4 weeks, try cutting a slit in the bag (see Step 1).
Sometimes mushrooms prefer growing on the sides of the bag due to the more ideal humidity and microclimate. To help combat this you can spray the center of the substrate a couple times and also spray the bag walls. This ensures there is more even humidity throughout the bag. Do note that even with side growth you can still get an impressive yield.
Why are my mushrooms clumping?
When mushrooms grow in dense clusters or form one big “blob,” it’s usually because of high humidity, low fresh air exchange, or both. These conditions make it hard for mushrooms to form individual stems and caps. It’s common and not harmful, but you can help them grow separately by:
✅ Making sure your grow area has good airflow ✅ Place a fan in the room to circulate air, but don’t point it directly at the bag. ✅ Avoid excess moisture buildup — don’t overspray, and make sure condensation can escape. ✅ Consider adding a small horizontal slice about 2 inches below the filter patch (same width as the patch) to increase airflow inside the bag. ✅ Providing indirect light — mushrooms need light cues to develop properly.
Clumped mushrooms are still perfectly safe and just as potent — you can gently pull them apart when harvesting!